|
Configure Base/Rover
|
|
Configure Base/Rover
|
Configure Base
For GPS equipment, it is necessary to set up the base antenna and record the correct antenna height, the antenna type (for certain equipment), and the methods used for localizing (obtaining the desired coordinates). This is accomplished with the command Configure Base, which only appears in the Equip menu if a GPS instrument is selected.
Much of Configure Base is common to most instruments. For example, the Base Ant. Height would be entered in feet or meters, depending on the setting specified in Units within Job Settings. Vertical or Slant height refers to the method used to measure the height of the base antenna. Vertical refers to the distance from the ground point to the antenna disk, measured plumb. Slant refers to the distance from the edge of the antenna disk down to the ground point directly beneath the center of the antenna. Elevation Mask refers to the degrees above the horizon above which satellites will be used for GPS “correction” calculations, and below which satellites will be ignored. Keep in mind that it is not always better to lower the elevation mask below 10 or 15 degrees. Satellites closer to the horizon than 10 degrees will often degrade the calculation of coordinates.
The “alternative” to Configure Base is Configure Rover. GPS receivers can usually function as either type, but must be “configured” for the role they will serve. You will be warned when you switch receiver configuration from Base to Rover and vice versa, to confirm that is what is intended.
With all RTK GPS Equipment selections (except GPS Simulation), Configure Base will first bring up settings and then proceed to the 6-option Configure Base screen which “locates” the base position. The 6-button Configure Base options (3 buttons per “tab”), common to all, are discussed first, followed by equipment-specific settings.
Configure Base for All RTK GPS Brands
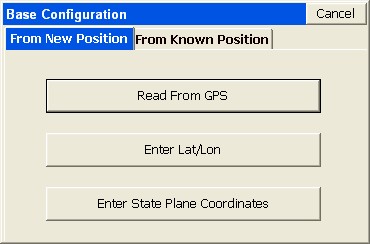
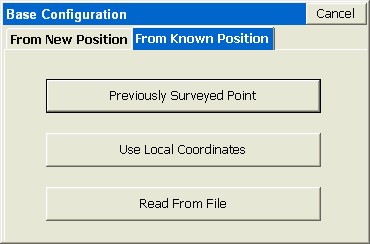
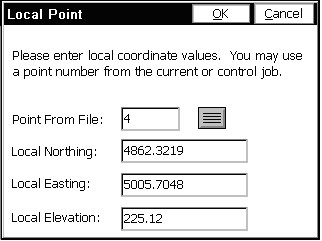
For all brands of GPS, the Configure Base button is the command that starts the base receiver broadcasting GPS corrections to the rover. You must click the Configure Base button in GPS Setup while you are connected to the base receiver. The base needs a set of coordinates to use as its stationary position. Given that you are configured for a particular coordinate system, there are 2 main “types” of localizations: (1) Enter an Accurate Base Position and work from that point outward on the scale and “true north” of that system (no rover localization), (2) Enter an Accurate or Semi-Accurate (Read from GPS) Base Position and then localize to known rover points that transform to the local coordinate system (required if the local system is not true GPS north). There is also a “mixed” base-rover approach. To use the base in the localization, you should configure the base with the "Use Local Coordinates" option under "From Known Position". Here, you configure the base by entering the local point (5000, 5000,100, etc.) and start a new localization file (or use an existing one if it applies). Then, at your rover, you can add more points to the localization as necessary. In this case, a single rover point within Localization will produce a scale factor and best fit to the local coordinates.
There are six methods to set the stationary base position, organized into 2 categories: From New Position includes Read from GPS, Enter Lat/Long and Enter Grid System Coordinates. The From Known Position tab includes Previously Surveyed Point, Use Local Coordinates and Read From File. When you are starting a new job (no information in the raw RW5 file yet), always use the options in From New Position.
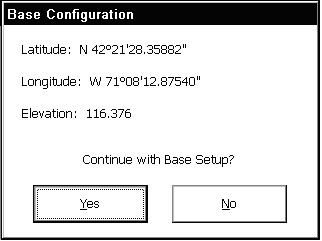
From New Position Options
Latitude: N 42d21’28.35882”
Longitude: W 71d08’12.87540”
Elevation: 116.376
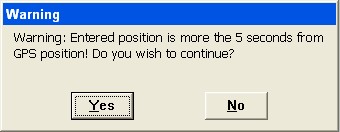
Continue with Base Setup?
Yes No
If you like the result, press Yes and continue on. You will then be prompted for the Reference Station Number. This is an “ID” that will store to the raw file and permit post-processing of the raw GPS data. A typical entry is 0001. The final prompt will say,
Base Configuration Successful. Save Settings to File?
Yes No
Answering Yes will bring up an entry screen for the reference file name. Reference files are stored with a “.ref” extension. It is important to save a reference file if you plan to return to the job at another date. Without re-localizing to control points, you can set up over the same base position, recall the reference file, and enter the new antenna height for the base position, and start working.
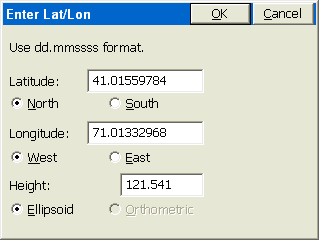
The Read from GPS option is sometimes referred to as “Find Me”. This option is accurate to about 10 to 50 meters, typically, and it enables the corrections to broadcast with enough accuracy to permit localization and sub-centimeter real-time work. Be sure that your GPS zone in Job Settings is set correctly before using this option. Also, give the base enough time to find itself. When first set up, the base receiver has to “collect” satellites and “resolve ambiguities”. If you Read from GPS too early, you may find a position, but one that is not fully resolved and ends up slowing down the speed at which the rover fixes.
This method should be used if you are reasonably sure of the accuracy of the latitude and longitude—it should be at least as accurate as the “Read from GPS” option, or otherwise you will have difficulty getting a “fix” on the rover. If it is a very accurate lat and long, you will get the best results. Pressing OK leads to the same options to store the base position as a reference file, similar to Read from GPS.
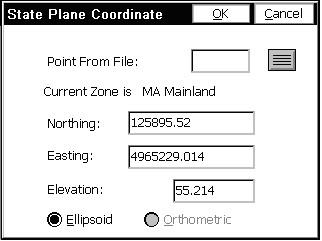
The Coordinate method is similar to the Lat/Long method, since Lat/Longs convert to Grid Coordinates based on the current “zone” set in Job Settings, GPS option. The Grid Coordinates will convert back to the Lat/Long coordinates needed by SurvCE to configure the base.
From Known Position Options
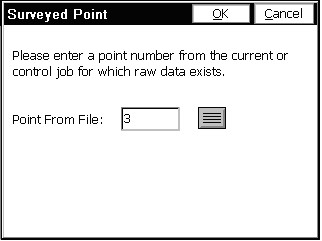
Like the other options, this continues on by showing the corresponding Lat/Long for the coordinate and allowing the user to save the result in a reference file.
When OK is pressed, you will be asked to load the associated “.dat” file, in a dialog similar to below:
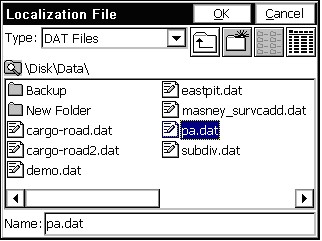
This option recalls a reference file in a dialog similar to that above. Then you will receive the standard prompting.
This is followed by the Reference Station ID prompt (showing the default ID). The “new” base antenna height, which will change with each new set up, is entered back at the first set of dialogs. A message is displayed after successful congifuration from a file. Only if you set the base antenna on the same horizontal and vertical position each day would the base antenna height remain fixed. If the base antenna height and x,y position is the same from day to day, then you do not need to do Configure Base each day. You would simply power up the base, power up the rover and start working in that case. Keep in mind that in certain power surge conditions, receivers can lose their settings, and a re-configuration may be necessary, even if the base receiver antenna has not been moved.
Note: In SurvCE 1.50.006 or later, a “quick connect” is performed when you exit and re-enter the SurvCE program. In earlier versions of SurvCE (before August 20, 2004) and after the release of SurvCE 1.50 in May, 2004, it was necessary to conduct a fresh Configure Base after exiting SurvCE.
Note: One method of obtaining Latitude/Longitude and state plane coordinates in the U.S. is to occupy a point, any point, for two hours or more, logging the static data, then submit the Rinex file to the NGS “OPUS” program accessible on the web. You must log the data with dual frequency equipment. The OPUS program is fully automated, and will return the x,y,z, lat, long, ellipsoidal height and orthometric height. This data can then be entered in during base localization. Though most post-processing programs (Trimble Geomatics Office, Leica SKI-Pro) use proprietary post-processing file formats, they will output the ASCII “Rinex” format needed by OPUS.
Configure Rover
For many brands of GPS, receivers will perform differently depending on whether they are set as base or rover receivers. Even though the receivers are identical, they perform differently depending on whether they are configured as a base or a rover. Multiple rover receivers can communicate with a single base receiver. The Configure Rover command is used to set the rover receiver to the correct parameters and to instruct the receiver that it is, in fact, a rover.